
Therefore, I missed the bad tension on a whole section of the pumpkins quilt. Like I always say, these stitches go in real fast, but come out real slow. It took several hours of "frogging", or "un-sewing" to get it all out.
Then, you are left with the holes from the previous stitching. You might be able to see the "needle tracks" in this photo.

Usually, I lightly mist, then use a coarse white towel to gently rub the fibers. Often, the cotton fibers will either fluff up from the moisture, or fill in to cover the holes.

On this quilt, I went on to Step 2, which is really soaking the backing with the water, then really rubbing hard with the towel. If I still see evidence of the previous stitching holes when it dries, I will try a third time by scrubbing with a soft toothbrush. I have also tried the edge of a credit card. Probably no one else will even notice the holes except me.
The quilt turned out really cute. It is a Thimbleberries block of the month, I believe. I used a leafy vine over the whole quilt.
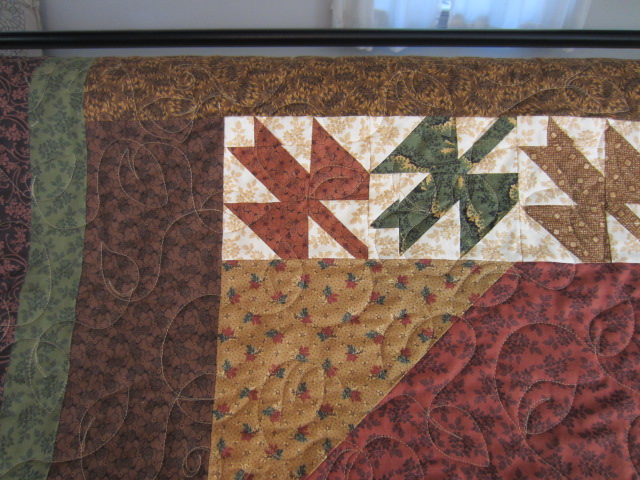
but in the area with the appliqued pumpkins and leaves, I added some plant elements like veins on the leaves and ridges on the pumpkins. Teresa had already hand-embroidered some of these, but I had to go in and add some quilting in these large areas.

To tie this section in with the rest, I had some of the leafy vine drape down over the large pumpkin.
Here is how that part looks on the back.

It is important to try to maintain the same amount of quilting throughout the quilt to avoid poofing or sagging of the unquilted areas.
Today's quilt is already loaded on the machine. Here is another tip I learned during my three invaluable days of classes with the incomparable Linda Taylor in Texas. Fold both backing and quilt top in half, line them up on two sides, and drape them over the length of your pick-up roller on the machine.

You should definitely see extra backing fabric on the bottom and one side if you have a large enough backing. You can also tell which way to load the backing and top. I admit that once I pinned the quilt top the long way and the backing the short way, and did not realize it until I got to the last row and ran out of backing fabric.
This quilt top could be a Christmas quilt, but it is not so Christmasy that it can only be used in December.

The petals of the fans are machine stitched. They kind of stick up on the ends, so I will have to be sure not to get my needle caught in there.

So far I have done a free-motion feathered swirl, with pointy areas to fill in and mimic the points of the fans. I got this idea from one of Darlene Epp's pocket guides on free-motion quilting.

Darlene's books have been very useful during the seven years I have had my Gammill. There are guides for meandering, textures and fillers, and borders and sashings. They are my first go-to resource when I am pondering ideas. I rely almost exclusively on free-motion quilting rather than patterns.

At $55.00 they are a little pricey, but I am rarely disappointed when I am looking for a free-motion design that enhances the fabric or quilt pattern.


