Tuesday, April 23, 2013

Some Small Projects

Between trying to sell our house (meaning keeping the house and yard looking nice), babysitting for my granddaughter twice a week, and going out of town every weekend, there has not been much extra time for crafting, painting, or sewing projects.

On the beach weekend where we celebrated the family birthdays, we gave Emily some pieces of luggage.  I made fabric luggage tags to help identify her ubiquitous black Samsonite!  I also made one to tuck in her mom's birthday gift bag.

 
I made the one on top using a combination of directions from various blog tutorials.  It required making a buttonhole, which I had never done on my Janome sewing machine.  Three hours later, my tag was done.  The next afternoon I made two more using the directions from a Quilting Daily free e-book.
 
My art quilt bee is going to try the fractured flower quilt that I saw at the Charlotte Quilt Guild Show.  Each participant makes a floral block, then cuts it up to distribute to the other members.  Here is the quilt that I saw at the show.
 

Wow x 6, by Susan Woodall, Phyllis Tarrant, Jane Burdick, Lisy McLeod, Doris Rushing, and Pat Hopkins.

 
We decided to make red or purple flowers on a cream background. 
 
I added some Steam-a-Seam Light to some fabrics from my stash, including a purple silk.  I drew a design for a flower on paper, and just copied it by cutting freehand.
 
Here is the first layer of petals.
 
 
Next came layer 2, utilizing some hand-dyed fabric.
 
 
Layer 3 made a center.
 
 
Finally came the purple silk and the center petals.
 
 
All this was fused and will eventually be quilted and embellished when it is divided up among the other participants.  Meanwhile, it needed to be stitched down somehow. 
 
I made a little sample to see how I wanted to do this.  I started out with a zigzag stitch, but quickly decided this was not the look I wanted.  I set my machine up for free-motion quilting, and just used it to stitch the layers of petals together.  Then I decided to quilt the rest of it and make a fabric postcard.
 
 
So, here is my block, stitched without any extra stabilizer to the cotton background fabric.  I used a variegated red and pink thread.
 
 
I can't wait to see it after it is embellished with beads, trim, or whatever else the other quilters have in store for it. 
 
And, because today is Tuesday, here is today's favorite picture of my grandbaby, happy little Charlie.  She is starting to really enjoy grabbing and playing with her toys.  And like her Gigi, she enjoys going on nature walks every day!


Sunday, April 21, 2013

Alzheimer's Art Quilt Initiative

I recently received an e-mail from Ami Simms with updates about the Alzheimer's Art Quilt Initiative.  I am happy to pass along this news to interested quilters out there in blogland.


The Alzheimer's Art Quilt Initiative is still going strong and aiming for the million dollar mark in funds raised for Alzheimer's research by the end of this year. To date our total is $914,000.

1. The May auction quilts are up! We are offering 27 beautiful quilts from the Priority: Alzheimer's Quilt project. The online auction starts on May 1st and runs to May 10th.

 
Here are some of my favorites.
 
In The Garden, by Joan Willcocks
Peachtree City, GA USA

Put a Bird on It, by Patricia Smith
Germantown, TN USA

The Mallorn Tree, by Lisa Dodson
Martinsville, IN USA
 
 
2. Participants in the AAQI's annual Celebrity Invitational Quilt Auction are confirmed for the November online auction. They are Charlotte Warr Andersen, Alex Anderson, Karen Kay Buckley, Linda Carlson, Pepper Cory, John Flynn, Diane Gaudynski, Renae Haddadin, Pat Holly, Libby Lehman, Patrick Lose, Marsha McCloskey, Sue Nickels, Barbara Shapel, Virginia & George Siciliano, Mary Sorensen, Ricky Tims, and Laura Wasilowski.
 
Whose quilt do you think will go for the highest amount?
 
 
3. The AAQI will return one last time to International Quilt Festival in Houston (Oct 30-Nov 3). We hope to bring 2,500 little quilts to sell and still need help reaching that goal. There is still time to make a quilt. The deadline isn't until August 1st. Details are here:

 
Be a part of the fight against Alzheimer's!


Wednesday, April 17, 2013

Striped Bias Binding

I was recently asked about bias binding, of the type that I like to use for baby quilts.  When cut on the bias, a striped fabric gives you that candy-cane look to add interest to a quilt.  Here is a corner of my granddaughter's quilt with the bias binding.

 
I normally only use bias binding when working with striped fabric, or when binding a quilt with curved or scalloped borders.  The stretchiness of bias is a good quality when you have to make a straight strip go around curves.  An example below is my quilt, Carolina Woodland Spring, with an irregular curved border.


Woven fabric basically has fibers going in two directions, the warp and the weft.
 
 
The warps are the long fibers that are parallel to the selvage.  We quilters call the warp direction the "straight of grain."  If you give a gentle tug on the straight of grain, there is not much "give" in the fabric. 
 
The wefts are the fibers that go under and over the warp.  If you tug the fabric from selvage to selvage, you will notice a lot more "give" or stretch.  Some piecers plan their cutting to allow for less stretch by utilizing the straight of grain.
 
The bias is like a 45 degree angle going right across the fabric warps and wefts.


Every piece of woven fabric has two biases, perpendicular to each other. Non-woven fabrics such as felt or interfacing do not have a bias.
 
Here is an example of a skirt with the plaid cut on the bias.


If you turn up one cut edge of the fabric to meet the selvage, you create a bias edge.  Very stretchy.  Ever had problems with the long edge of triangle pieces?
 
 
There is a method of cutting binding strips on the binding that allows it to come out in one long piece.  I have not had much luck with it, and I dislike drawing the lines on the fabric.  But here is an example of a tutorial on that method.
 
The way I do it is to fold up one corner of the fabric to create a bias edge.  Using my rotary cutter, I cut along the bias edge about half an inch larger that the binding I plan to make.
 
Then I trim the strip to the desired size along the bias edge.  After that, just continue cutting strips the exact size of your binding width.
 
Then you join the strips by mitering just like any other binding strips.  Put two strips right sides together, with one perpendicular to the other.


I like to try to match the stripes a bit so that when they are joined, the seam will not be obvious.  Use pins to keep the fabrics from shifting.
 
 
I use an index card and a mechanical pencil to draw a seam line from corner to corner.
 

Stitch along the seam line. 


Once you have sewn the seam, trim it to about a quarter inch.  I iron mine open.  Then cut off the little "mouse ear" corners so you have no more thickness than necessary.


Your seams will look good and your binding strips will be nice and even.  Can you tell where the seam is?  You can only tell below because of the mouse ear triangle.


There are lots of ways to make binding.   This is just a way I know how to do it so it comes out looking nice.  Here is a picture of Baby Charlie's bias binding from the back side.
 
 
I still have one of the unfinished quilt tops from my sister-in-law's grandmother.  It is a double wedding ring with scalloped edge.  I will need miles of bias binding to go around it!
 
 
I still have not hemmed the back of Lucas's binding to the quilt.  Better get going on that!  But here is a daily dose of cuteness for you.
 
 
I am loving this babysitting gig!

Tuesday, April 16, 2013

Beach Weekend

We took a long weekend starting on Thursday to celebrate a whole bunch of family birthdays at Sunset Beach, NC.  Our son, Bryson;  his son, Avery; our daughter-in-law, Emily; and her mother, Maribeth.  The weather cooperated and we spent each day out on the beach.

After arriving late Thursday afternoon, we let the kids go down to the beach in their clothes with the admonition, "Just don't get wet."  Yeah, right!

 
Friday was supposed to be a wash-out, but the rain ended early in the morning.  It was windy but so nice to be on the beach.
 
 
Notice we had both our dog, Kasey, and Dave's dog Roo on the beach with us.  In the summer, they cannot be on the strand during the day.  We got Kasey's hair cut the day before we left just in case it was hot.

 
This was our granddaughter Charlie's first beach trip.  I think she liked it!
 
 
The condo we rented was ocean-front, but there is a large buffer of dunes and scrub trees between the houses and the beach.  We were startled to see this deer right on the sand dunes in front of our place.
 
 
I got up early on Sunday morning to walk the dog and take some pictures of the sunrise.
 
 
Sure hated to leave on Sunday morning.  We are lucky to go back to Sunset Beach every summer for a week of vacation with our family.  This was a good preview!
 

Monday, April 15, 2013

Hello Again

Sometimes bloggers don't post for awhile because they have nothing new to write.

Sometimes it is because they have too darn much new stuff to write about!

We went to our mountain place for Easter weekend.  Beautiful weather for being outside almost all the time, although it was still chilly.  The distant mountain peaks were still covered with snow.

 
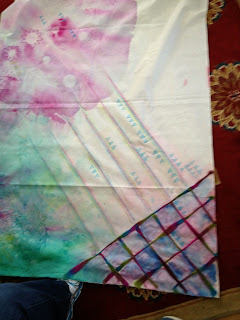
On Easter Monday, my art quilt bee met at Peg's house.  I returned the last of the round-robin fabric challenge pieces, which belongs to Marion.  Hers ended up being in four distinct "layers."  In fact, if she cut it up and sewed it back together in different order, it would almost look like worms under the ground!
 
 
I did not touch the button-dot candy section.  The bottom section had been yellow swirls.  I decided to use it as a background layer for some ferny greenery.  Using both positive and negative stamps and stencils, I applied the designs with Setacolor Paints.  Since all the other sections had circle designs, I added some green dots with acrylic paint on bubble wrap.
 
 
The other layers looked like little one-celled organisms like spirochetes, so I added some Lumiere shiny paint and some Zentangle-like doodles.

 
Toni had already added some buttons to the upper sections, so I doodled around them.


Peg had already taken her piece of finished fabric,
 

and made it into two art quilts!


Even the quilt backing was made from her "artsy" fabric.


The next day, I started my new part-time job!  The commute is fairly long (45 minutes), the pay is non-existent, but there are good perks.  I get to wear shorts, bring my dog and my latest novel to work, and play with this all day!


I am babysitting for Baby Charlie on Tuesdays and Wednesdays.  I am having such a good time with her!
 
The Whacky Ladies met on Thursday night last week.  Here are a few pictures from our meeting.
 
Carolyn is making great progress on her batik sampler Block-of-the-Month from Wish Upon a Quilt.  She is using a Sharyn Craig setting for the blocks.
 
 
Irene had a gorgeous blue and yellow Yellow Brick Road top to show.
 
 
Mary finished the batik quilt that she was concerned about the fabric in the sashing last time.  We all thought it turned out great.
 
 
Mary also had a quilt that she made for one of her grandsons.
 
 
Donna made two quilted versions of the Challenge Quilt for the Carolina Longarm Association's next show.  She quilted the first one in radiating rays.
 
 
The second one had very decorative feathers and swirls in a contrasting red thread.
 
 
Marilyn finished the Christmas table runner that she has been working on at our meetings.
 
 
I got to show off my finished quilt for Baby Charlie.  I named it Mermaid Lagoon.
 
 
I also had great-nephew Lucas's quilt, which I have named Monkey Business.  I still have to hand stitch the binding on the back.


Okay, I hope that is enough quilty stuff to get me caught up!  We just got back Sunday from a family weekend at the beach, and I have some beautiful pictures to show off.