Showing posts with label long-arm quilting. Show all posts

Tuesday, March 27, 2012

Pretty Spring Quilt

Finished quilting Marge's beautiful top.  It is rendered in springlike colors of white, green, and purple, with a luscious border of roses.


It looks like windowpanes, especially pictured just below my windowpanes!

She wanted an overall design, so I did leaves and flowers in a yellow-green Signature thread called "Pear Green."  Marge was almost as pleased with the back  as the top.


I had a lot of trouble with the tension on this project.  Sometimes that just happens, but this one might have been caused by a perfect storm of tone-on-tone backing that was not pre-washed, tightly woven white cotton on the front, a somewhat scratchy batting, and perhaps that color of thread.  Places on the back looked like they were "flat-lining."  In other words, the bobbin thread was just kind of lying there, not pulled in to the center of the quilt by the top thread.

Lots of picking and re-sewing later, it turned out pretty nice.


Here are some more  photos from yesterday's walk.  Wouldn't this quilt look great on display by any of these spring landscapes? 


Thursday, August 11, 2011

Longarm Quilting- and Un-quilting!

You might have seen my recent post about using a mirror on the longarm table to get a glimpse of what is happening on the back side of the mounted quilt.  That only works when you actually LOOK in the mirror.  That usually does not happen until you are at the end of a row and ready to roll up.


Therefore, I missed the bad tension on a whole section of the pumpkins quilt.  Like I always say, these stitches go in real fast, but come out real slow.  It took several hours of "frogging", or "un-sewing" to get it all out.


Then, you are left with the holes from the previous stitching.  You might be able to see the "needle tracks" in this photo.


Usually, I lightly mist, then use a coarse white towel to gently rub the fibers.  Often, the cotton fibers will either fluff up from the moisture, or fill in to cover the holes.


On this quilt, I went on to Step 2, which is really soaking the backing with the water, then really rubbing hard with the towel.  If I still see evidence of the previous stitching holes when it dries, I will try a third time by scrubbing with a soft toothbrush.  I have also tried the edge of a credit card.  Probably no one else will even notice the holes except me.

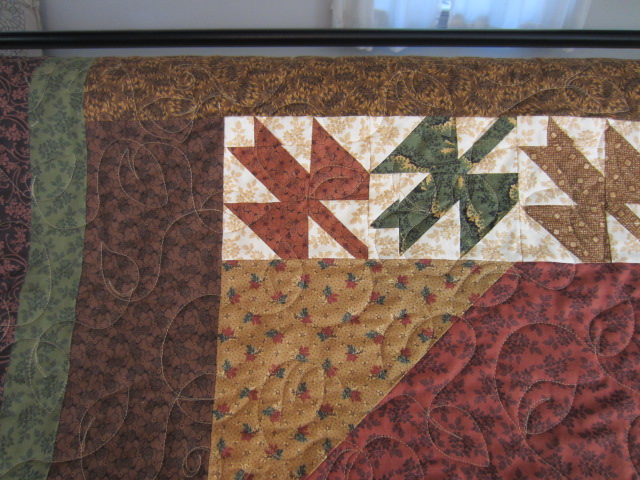
The quilt turned out really cute.  It is a Thimbleberries block of the month, I believe.  I used a leafy vine over the whole quilt.


but in the area with the appliqued pumpkins and leaves, I added some plant elements like veins on the leaves and ridges on the pumpkins.  Teresa had already hand-embroidered some of these, but I had to go in and add some quilting in these large areas.


To tie this section in with the rest, I had some of the leafy vine drape down over the large pumpkin.

Here is how that part looks on the back.


It is important to try to maintain the same amount of quilting throughout the quilt to avoid poofing or sagging of the unquilted areas.

Today's quilt is already loaded on the machine.  Here is another tip I learned during my three invaluable days of classes with the incomparable Linda Taylor in Texas.  Fold both backing and quilt top in half, line them up on two sides, and drape them over the length of your pick-up roller on the machine.


You should definitely see extra backing fabric on the bottom and one side if you have a large enough backing.  You can also tell which way to load the backing and top.  I admit that once I pinned the quilt top the long way and the backing the short way, and did not realize it until I got to the last row and ran out of backing fabric.

This quilt top could be a Christmas quilt, but it is not so Christmasy that it can only be used in December.


The petals of the fans are machine stitched.  They kind of stick up on the ends, so I will have to be sure not to get my needle caught in there.


So far I have done a free-motion feathered swirl, with pointy areas to fill in and mimic the points of the fans.  I got this idea from one of Darlene Epp's pocket guides on free-motion quilting.


Darlene's books have been very useful during the seven years I have had my Gammill.  There are guides for meandering, textures and fillers, and borders and sashings. They are my first go-to resource when I am pondering ideas.  I rely almost exclusively on free-motion quilting rather than patterns.


At $55.00 they are a little pricey, but I am rarely disappointed when I am looking for a free-motion design that enhances the fabric or quilt pattern.


Thursday, March 11, 2010

Yesterday's Quilting

My Gammill has been getting a good workout lately. Right now I have a good supply of customer quilts, and at least ten more charity quilts waiting for me. Yesterday I started with a soft, sweet baby quilt top by Teresa.

It was so cuddly I felt like taking a nap right then and there!
The fabrics featured butterflies, duckies, and hearts, so I just free-motioned some of those motifs. Teresa chose a pale yellow thread which blends in with the fabrics. But when you quilt on flannel, you always get a lovely sculptural quality.

The back is a yellow flannel print which looks nice all quilted.

Then I did some fast quilting on a top donated anonymously to the Capital Quilters' Guild Quilts on Wheels charity for rest home residents. This top appears to be made from a quilter's stash of old calico fabrics. A great way to use up the out-dated fabrics for a good cause...and they still make lovely comfy quilts, don't they!


I have so many of these to do that I am trying to do FAST quilting. I just did spirals and echoed them and swooped around at high speed.


This one did not come with a backing, so I used the last of the bolt of plaid flannel that I brought home from the Flower Cottage last summer. Another soft, cuddly quilt.


I have heard from all three of my give-away winners, so I will be mailing out their fabric bundles shortly. This little drawing brought me so many lovely comments and even a new member of my local quilt bee! I sent a notice to the guild about the drawing, and received an e-mail from another Wake Forest quilter who is looking for a bee. So, I have some new blog friends and will soon have a new in-person friend! Good stuff!

Wednesday, February 3, 2010

Sometimes I Amaze Myself...

I never would have guessed that this old quilt top would turn out so pretty! It is off the machine now, waiting to have the thread tails trimmed, the binding put on, and, oh, yes, it needs a bath after spending the last forty years or so in a plastic bag!


This was not my favorite quilt to work on for many reasons, but now that the quilting is done, I'm singing, "You Are My Sunshine, My Only Sunshine..."

The Quilters' Dream Puff backing was a good choice to fill in the saggy areas of the quilting.


The backing is white muslin, and it looks very textural and frothy like a wedding cake!


This quilt has a twin that is waiting for the same treatment...but I am going to do a few other smaller projects first before tacking such an intensive project again.

Friday, September 18, 2009

Double Your Pleasure, Double Your Fun

I have been quilting lots of tops for my guild's charity, Quilts on Wheels, which provides warm snuggly quilts for residents confined to wheelchairs in rest homes. One of my groups, the CyberBee, is in charge of the program for the next two years, and my local bee, The Whacky Ladies, have been very active in making quilt tops. We had a sew-in day back in July at Quilts Like Crazy in Wake Forest. Marilyn made enough Yellow Brick Road blocks to make two quilts. Since her backings and tops were exactly the same size, I decided to mount both on the longarm at the same time and quilt them together.
Instead of centering one quilt on the leaders, I started pinning about a half inch from the center mark and going out. The only disadvantage to this method is that you can only clamp one side of each quilt with the clamps that help keep the quilt sandwich nice and taut. That did not cause any problem with these two quilts.

Marilyn used Americana-themed fabrics in red, blue, and tan. I quilted hearts and stars in a meander with taupe thread.

The teddy bears and country angels are so cute!


I also popped this little flannel quilt on the machine and did a fast and easy basic leaf meander. Some lucky senior citizen will love the soft cozy warmth of this quilt made by my friend Jean.


Speaking of charity quilts, the Capital Quilters raffle quilt from the North Carolina Quilt Symposium in May made almost five thousand dollars in profits. It is all being donated to a program to stop hunger for the homeless in Raleigh. But that's not all...the Fletcher Foundation provided a matching amount, raising the total to almost ten thousand...and from there, other companies have continued to provide matching grants, raising the grand total to almost sixty thousand dollars! From one quilt! This is a tremendous fund-raising success. Congratulations to all who helped design, make, and sell tickets for this lovely quilt.
We had a great guild meeting last night. Our members have been busy making quilts this summer...there were many quilts to drool over at Show and Tell, the charity quilt parade, and a special set of challenge quilts made from block party designs from last year. What an inpiring group!
We are heading to our little cabin in the North Carolina mountains this weekend. I am excited because our son from South Carolina is coming up with his two children. We LOVE to have our grandkids up there! I think I will have a chance this afternoon to visit the quilt show in West Jefferson by the Ashe County Piecemakers Guild. Here is the information:
Sep 18-19, 20097th Annual Quilt ShowWest Jefferson, NC
Location: Jefferson Station 230 Hice Avenue
Sponsor: Ashe County Piecemakers Quilt Guild
Admission: Free, donations gladly accepted
Hours: Friday 10-6:00, Saturday 10-4:00
Comments: This show will feature the Guild's Challenge Quilts - "I See A Song in My Quilt," Antique Quilts (pre1940), 100+ quilts/quilted items on display, and will include vendors, guild boutique, quilts for sale and the guild's Crazy Quilt raffle quilt to be given away at the end of the Quilt Fair. Tickets for the raffle quilt are $1.00 each or 6 for $5.00. There are many art galleries, restaurants and local shops within walking distance of Jefferson Station and we have plenty of parking. Contact: Brenda Cole wolfpackers@embarqmail.com or 336-246-3230

Have a great weekend, everyone!

Tuesday, July 28, 2009

Christmas in July?

Well, yesterday I showed you the Christmas tree farms. Today, a Christmas quilt that I worked on yesterday. It was definitely not Christmasy weather here in North Carolina. The day was hot and humid, and then erupted into thunderstorms in the afternoon. But I managed to finish this very pretty quilt in contemporary colors.

The customer wanted an overall design, so I looked at the motifs on the fabrics and used spirals, holly leaves, and little leaves/berries.

We used King Tut "Reed," a yellow-green cotton thread slightly darker than the greens in the quilt. I was not too sure how it would look, but I am really happy with the way this quilt turned out. The back is the yellow-green with colorful small squares in the picture above, and the quilting does not show on it at all.

I have one more to do for this customer- a gorgeous Moda in soft taupe, rose, and blue. The thread I ordered from Gammill was waiting on my doorstep when we got back on Sunday- they provide super-fast service.

Thursday, January 15, 2009

Cardboard clamps for re-quilting

First of all, I was pleasantly surprised yesterday when an item from my Etsy shop was featured in a Mardi Gras showcase by Treasury West:


This page will expire soon, but it was great fun to be selected for a showcase after only a week of shop-ownership and with precious few items in my shop! My item was the fabric postcard in the last photo.
In my last post, I mentioned using cardboard tubes to clamp a quilt back on the rollers of the long-arm quilting machine if you need to add or repair some quilting.
For non-longarmers, a longarm machine such as my Gammill has rollers in front and back which support the quilt sandwich while you work. I normally pin the backing to the pick-up roller and backing roller, which have canvas "leaders" attached. Then I layer the batting and quilt top on it. Sometimes I also pin the top to another roller, but often just "float" it on the backing and batting.

Now, I happen to have zippered leaders, which are nice because you can do the pinning while sitting down watching TV. But their best advantage is that you can unzip the whole quilt sandwich from the machine to do any necessary "un-stitching" or "frogging" (rip-it, rip-it) if your stitching does not look good.

Now, the thing to do is carefully check your quilt when you are finished, to make sure there are no unquilted areas, or areas of poor tension, etc. You do this before removing all the pins.

On this little baby quilt, I did not discover the unquilted area until I had sewn on the binding and was burying thread tails. Of course, it is a small size, and I could have quickly put in a few pins to put it back on the machine. But here is a little trick for lazy quilters.

Take the big cardboard tube from the inside of a roll of quilt batting. It looks just like a big paper towel tube. Cut a horizontal slit from end to end with strong scissors or craft knife. Then, use it as a big clamp to temporarily secure the quilt back on the rollers.

When I was taking classes from Linda Taylor in her delightful bed-and-breakfast studio in Texas, I noticed that none of her machines had zippered leaders. She said that when she had to put a quilt back on the machine, she put a few pins to secure it to the pick-up roller, and just leaned against the belly bar with, well, her belly, to secure the front part.

Anyway, the cardboard clamps work if the area to be requilted is not too close to the bar. On the small quilt yesterday, the machine barely made it to the unquilted area.
So, today I am looking forward to "heading for the hills" to our little cabin in northwestern North Carolina mountains. It will be the coldest weekend of the season. But I have not been up there since early November, and have really missed it. I have a tote bag full of library books, my sketchbook, Mamma Mia! and Across the Universe and my new Pamela Allen DVD's for entertainment, and the handwork I have been saving. I think I will be snug indoors while hubby is roaming the hills in search of the elusive wild turkey. That is, if the power does not go off! Last year we were there during a bad ice storm, and the electricity never even flickered off. We are not coming home until Monday and we do not have Internet access up there. Pictures of frozen ponds and waterfalls are sure to follow!

Friday, August 29, 2008

Rainbows thread success

When my friend and fellow CyberBee member JoAnn brought me this quilt, she brought along a spool of Superior Rainbows thread to try. I was pessimistic that it would work on my Gammill, but was willing to give it a try. To my surprise, I was able to run it without too much trouble! This is a thin poly thread with lots of color changes and a nice sheen. Typically, I either have thread breakage or tension problems with specialty threads.


Superior Threads has a reference chart on their website with recommendations for needle size and other adjustments. They recommended reducing the tension for this thread. I loosened both tensioners until the knobs were about to fall off. That didn't get the tension right. Then I took the thread out of the three-hole guide and just threaded it through one hole.

Still needing to reduce tension, I wrapped the thread only once around the rotary tension instead of the usual one and three quarters.

I also used a thread net around the spool to keep the thread from slipping off. Voila, good tension!By the way, I also had to unscrew the three prongs that go in the center opening of the spool. Now, why can't all cones of thread have the same size opening?

Anyway, here is the quilt draped over the machine before quilting the black border. Isn't it stunning? I loved the colors.

Here is the center medallion.


And the outer border, inner border, and blue area.


I am glad to get this done before the Labor Day Holiday weekend. We are staying home to get ready for the installation of new floors in our entire downstairs. We are exchanging our old, damaged and stained vinyl floor in the kitchen with porcelain tile. The living room, foyer, and dining room will be hardwood. Lots of stuff to pack up and move, but I think it will be well worth it!